How to create an empty VM
Overview¤
As well as deploying pre-built VMs from a catalog, you can build your own VMs from scratch, as you would do on a physical machine, using an ISO image in place of a physical CD or DVD.
For information about creating a VM from a template, see How to create a VM from a template.
Creating an empty VM¤
-
In the VMware Cloud Director Virtual Datacenters dashboard, select the VDC that contains the vApp in which you want to create the VM.
-
In the left navigation panel, select vApps to view a list of vApps within the VDC.

-
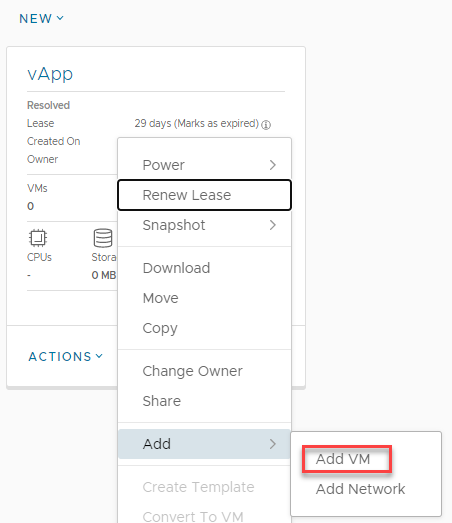
In the card for the vApp in which you want to create the VM, select Actions then Add VM.
-
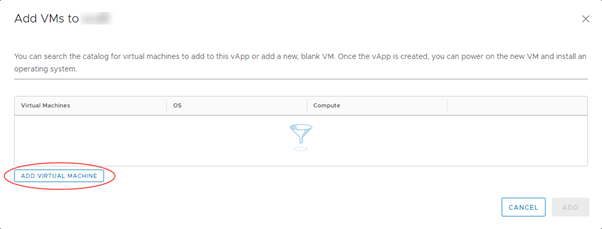
In the Add VMs dialog box, click Add Virtual Machine.
-
In the New VM dialog box, from the Type radio buttons, select New.
-
Enter a Name, Computer Name and Description for your VM. The computer name can only contain alphanumeric characters and hyphens.
-
Select the OS Family to use for your VM, then from the Operating System list, select the specific OS that you want to use.

-
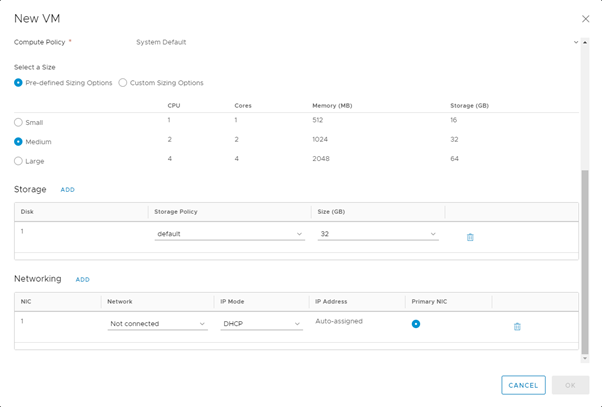
Select a Size for your VM based on the number of vCPUs and cores you require.
You can select from Pre-defined Sizing Options or select Custom Sizing Options to enter specific compute, memory and storage settings.
-
If you want to run virtualisation servers as a VM, you can edit the properties of the VM after it has been deployed and, in the Hardware section, select the Expose hardware-assisted CPU virtualisation to guest OS check box.
For example, you can run a Windows 2008 or 2012 server with Hyper‑V, or a VMware ESX host.
-
In the Storage section, set the Storage Policy and Size (in GB) of storage for the VM. You can also add more disks.
-
In the Network section, specify which Network to connect the VM to and select an IP Mode to determine how IP addresses are assigned:
-
DHCP VMware Cloud Director interacts with the OS via VMware Tools to use DHCP rather than static IPs.
-
IP Pool is the usual method, which injects an IP address into the VM via VMware Tools from a list of available IP addresses. The address may vary with each boot, but there is a check box to keep IP address assignments elsewhere within the UI once the VMs are created.
-
Manual IP is similar to IP Pool, but you need to enter a valid IP Address from the pool, which the VM will then keep.
-
-
When you're done, click OK.
-
Back in the Add VMs dialog box, you can add more VMs or click Add when you're done.
You can monitor progress in the Add VMs dialog box or click Cancel to return to the list of vApps while the VM is created in the background.
The VM will be deployed without any operating system.
Installing an operating system into the VM¤
-
On the card for the vApp that contains the VM, click Actions > Power then select Power On.
This starts the vApp and all the VMs within it. The vApp shows a status of Powering on, then Running.
-
In the left navigation panel, select Virtual Machines to view a list of VMs within the VDC.
-
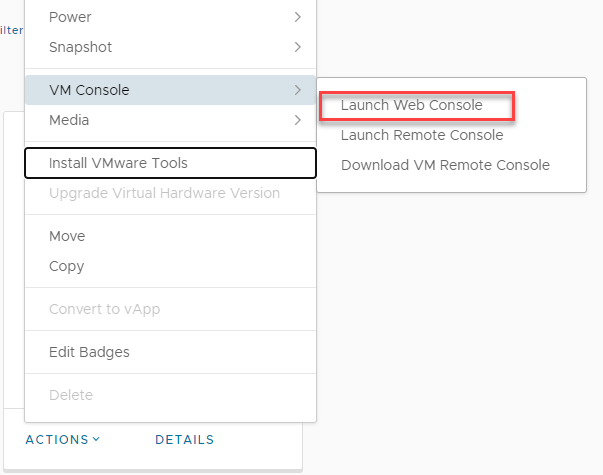
In the card for your VM, click Actions > VM Console > Launch web console.
-
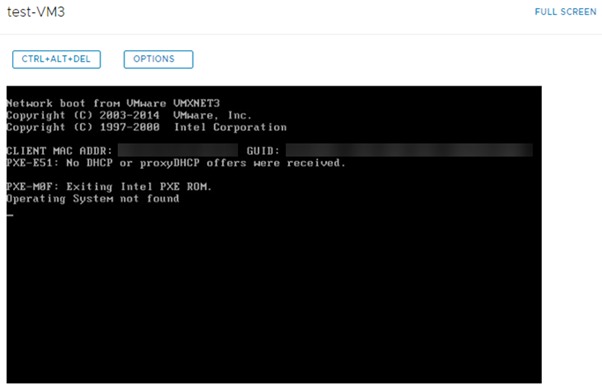
As with a physical server, no virtual CD or DVD is available at first boot, so the server will attempt to PXE boot.
-
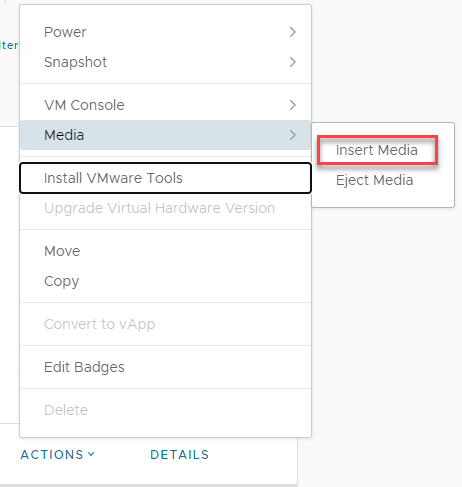
In the main VMware Cloud Director interface (not the console), in the card for the VM you want to work with, select Actions, Media then Insert Media.
-
Select the ISO image you want to mount from a catalog, then click Insert.
-
In the card for the VM, select Actions, Power then Reset to reset the VM so that it picks up the virtual CD/DVD.
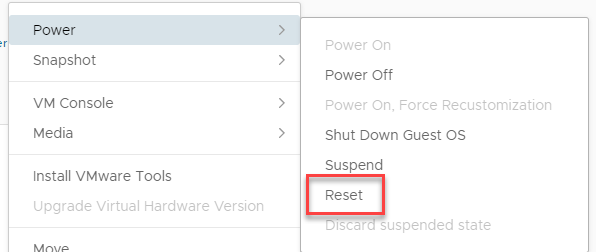
After a short while the VM will start the boot process and pick up the CD/DVD. Resize the VM console if necessary or go to full screen.
-
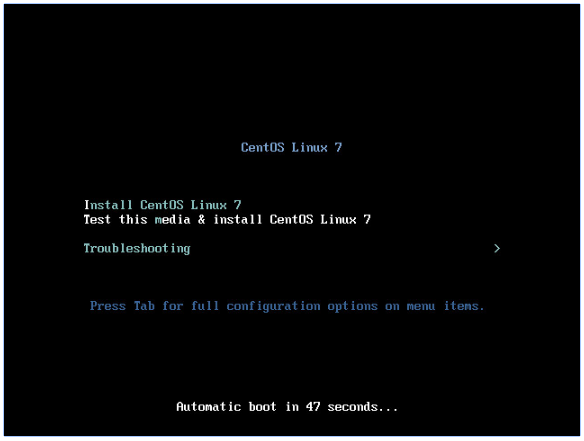
Carry out the operating system install as normal. When you've finished, remember to install VMware Tools.
For more information, see VMware Tools Installation.